[Dev] Arduino 0x00 LED 闪烁(Blink)
开始玩 Arduino 单片机当然要来折腾一下,来点亮我们第一个 LED 吧!没啥技术含量,随便看看就好了。
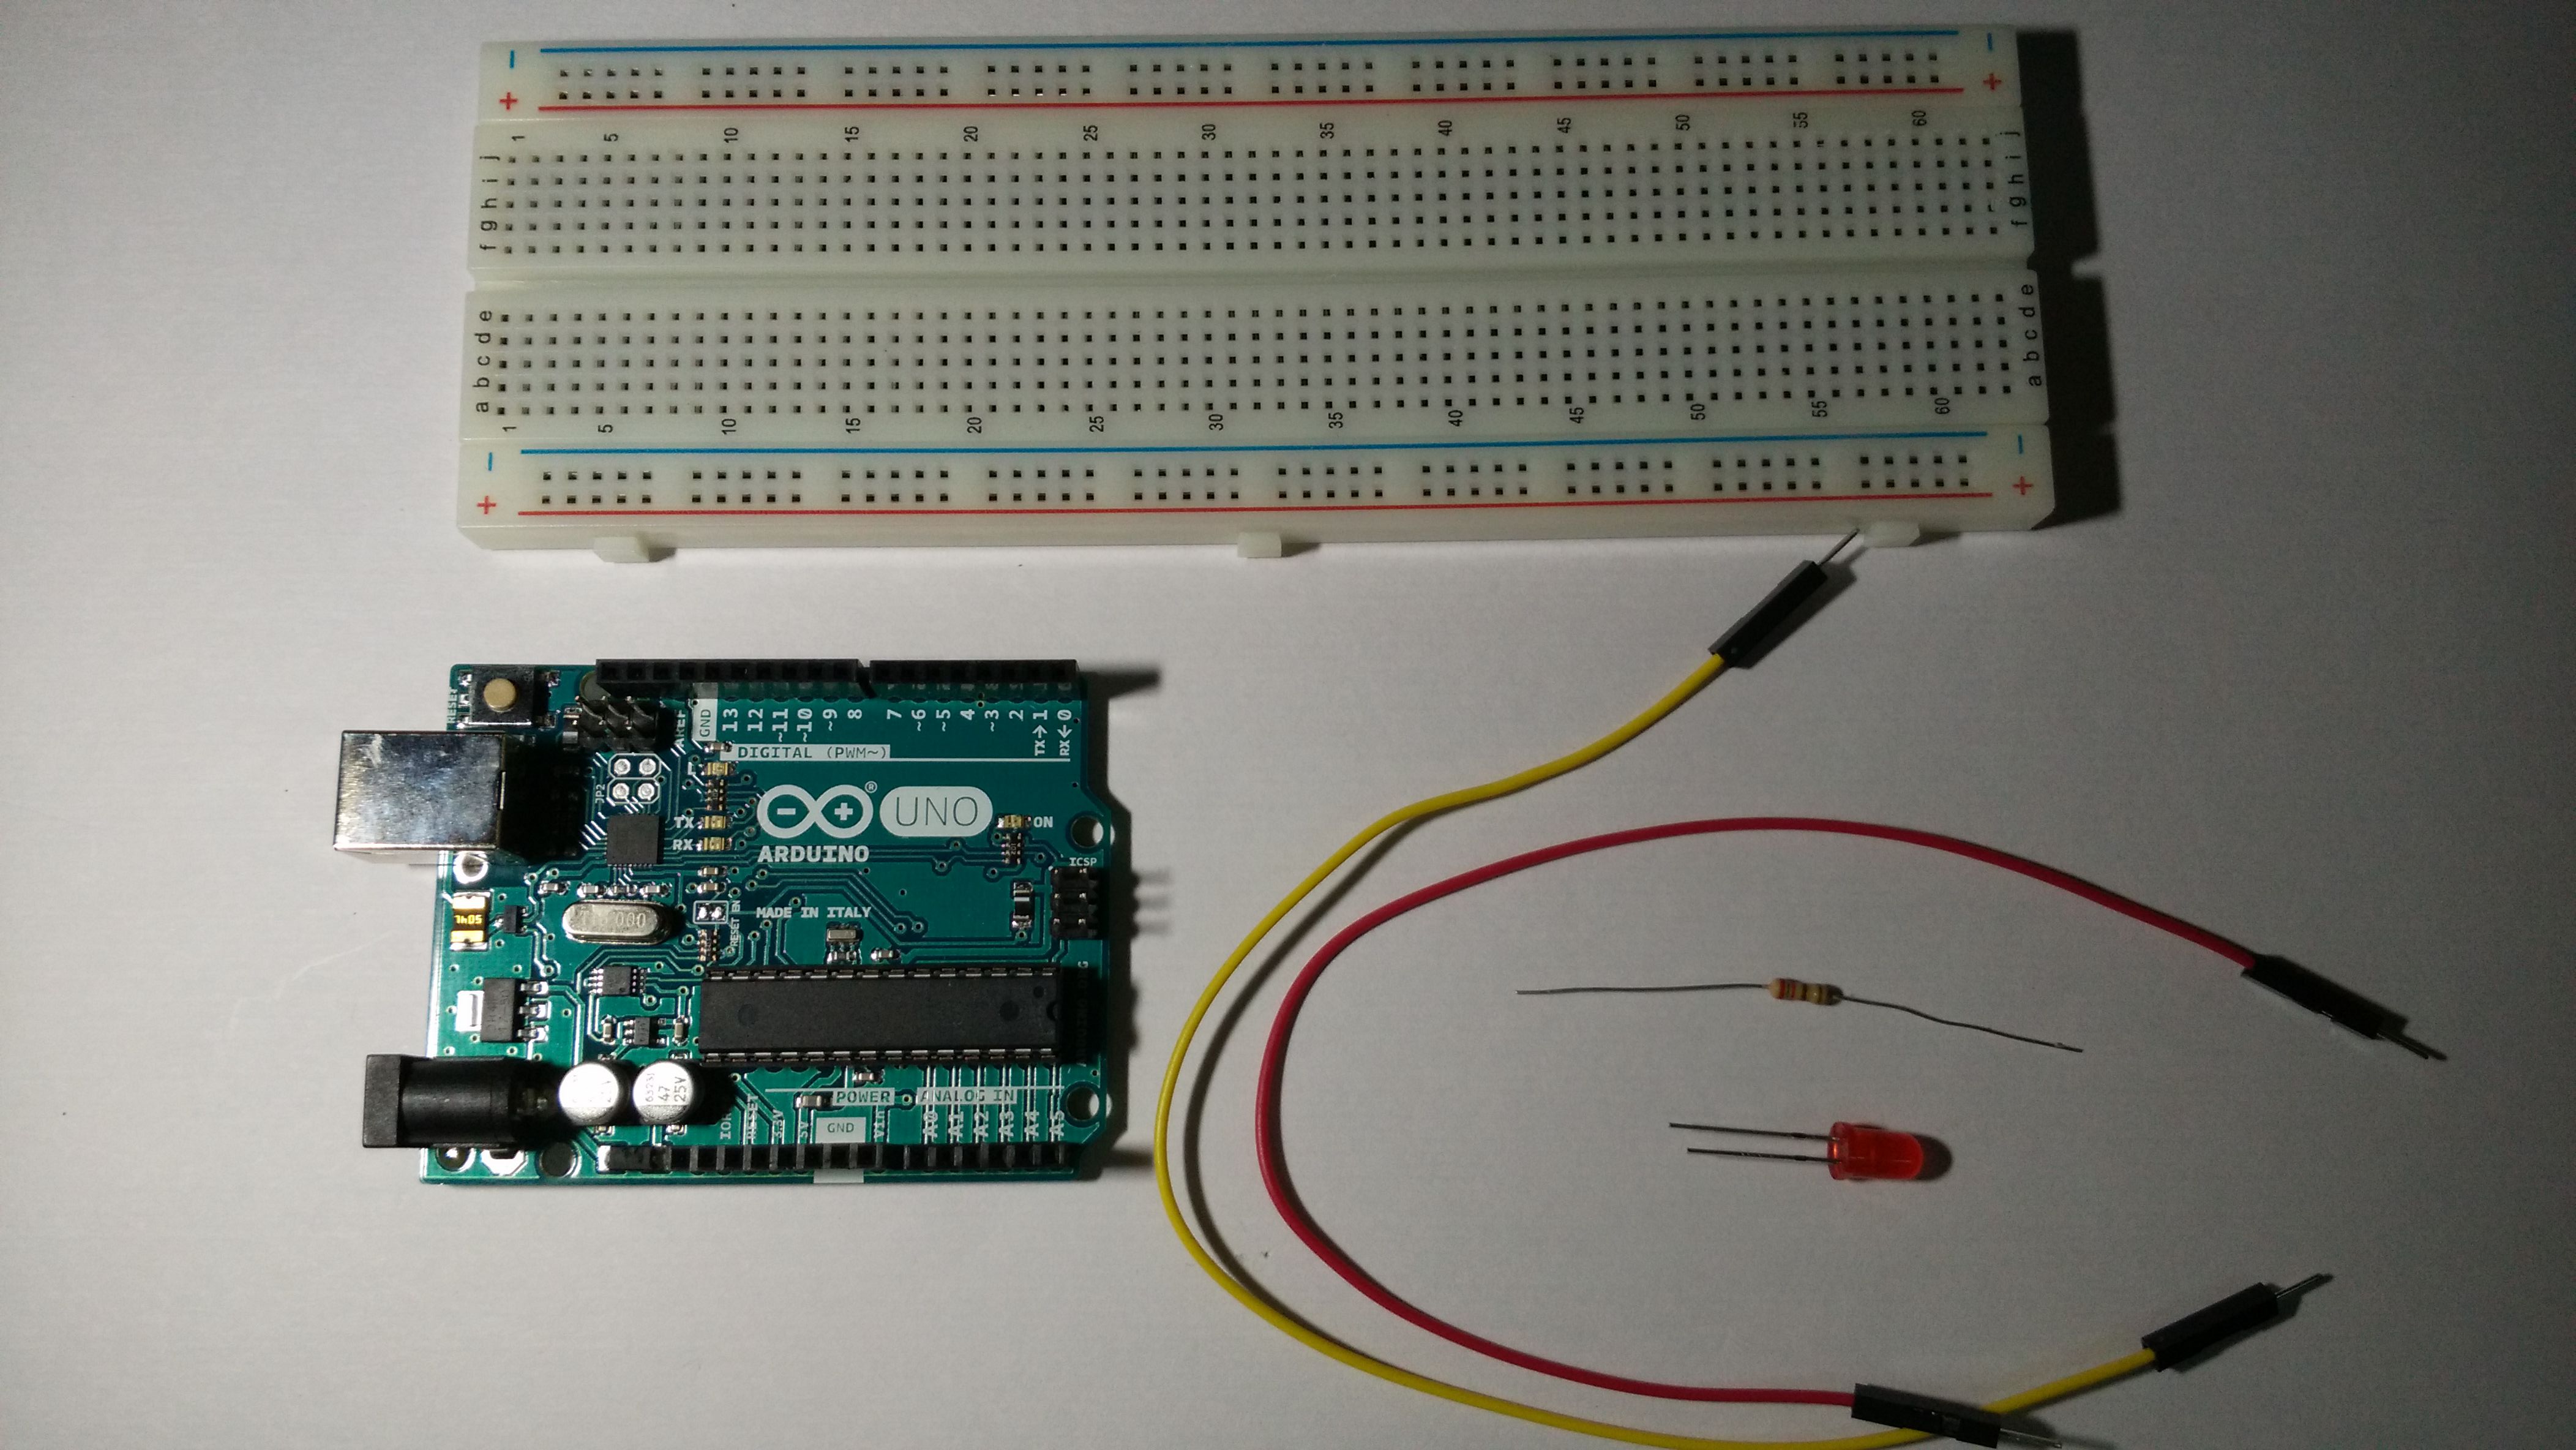
材料:Arduino *1,面包板 *1,220Ω 电阻 *1,LED *1,杜邦线 *2
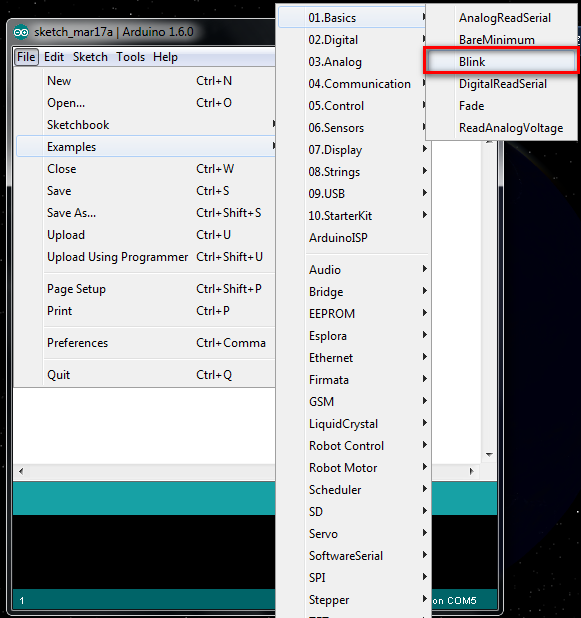
首先打开 Arduino IDE,IDE 本身就集成了许多 Exmple,我们可以直接用,现在我们来调用最简单的 Blink 也就是 LED 的代码。
然后我们就可以看到一个新的代码窗口了。
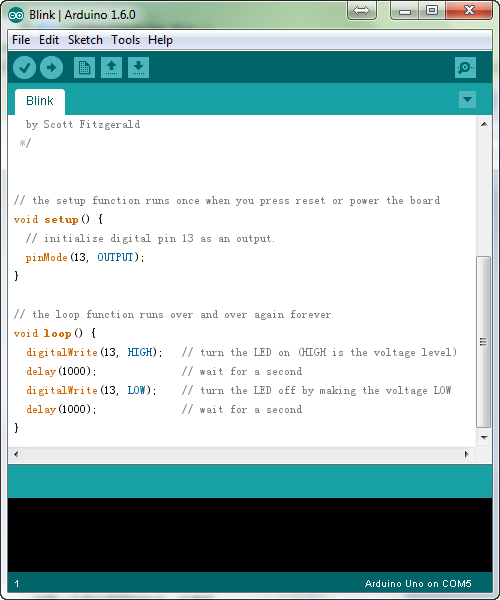
/* Blink Turns on an LED on for one second, then off for one second, repeatedly. Most Arduinos have an on-board LED you can control. On the Uno and Leonardo, it is attached to digital pin 13. If you're unsure what pin the on-board LED is connected to on your Arduino model, check the documentation at http://arduino.cc This example code is in the public domain. modified 8 May 2014 by Scott Fitzgerald */// the setup function runs once when you press reset or power the board
void setup() {
// initialize digital pin 13 as an output.
pinMode(13, OUTPUT);
}// the loop function runs over and over again forever
void loop() {
digitalWrite(13, HIGH); // turn the LED on (HIGH is the voltage level)
delay(1000); // wait for a second
digitalWrite(13, LOW); // turn the LED off by making the voltage LOW
delay(1000); // wait for a second
}
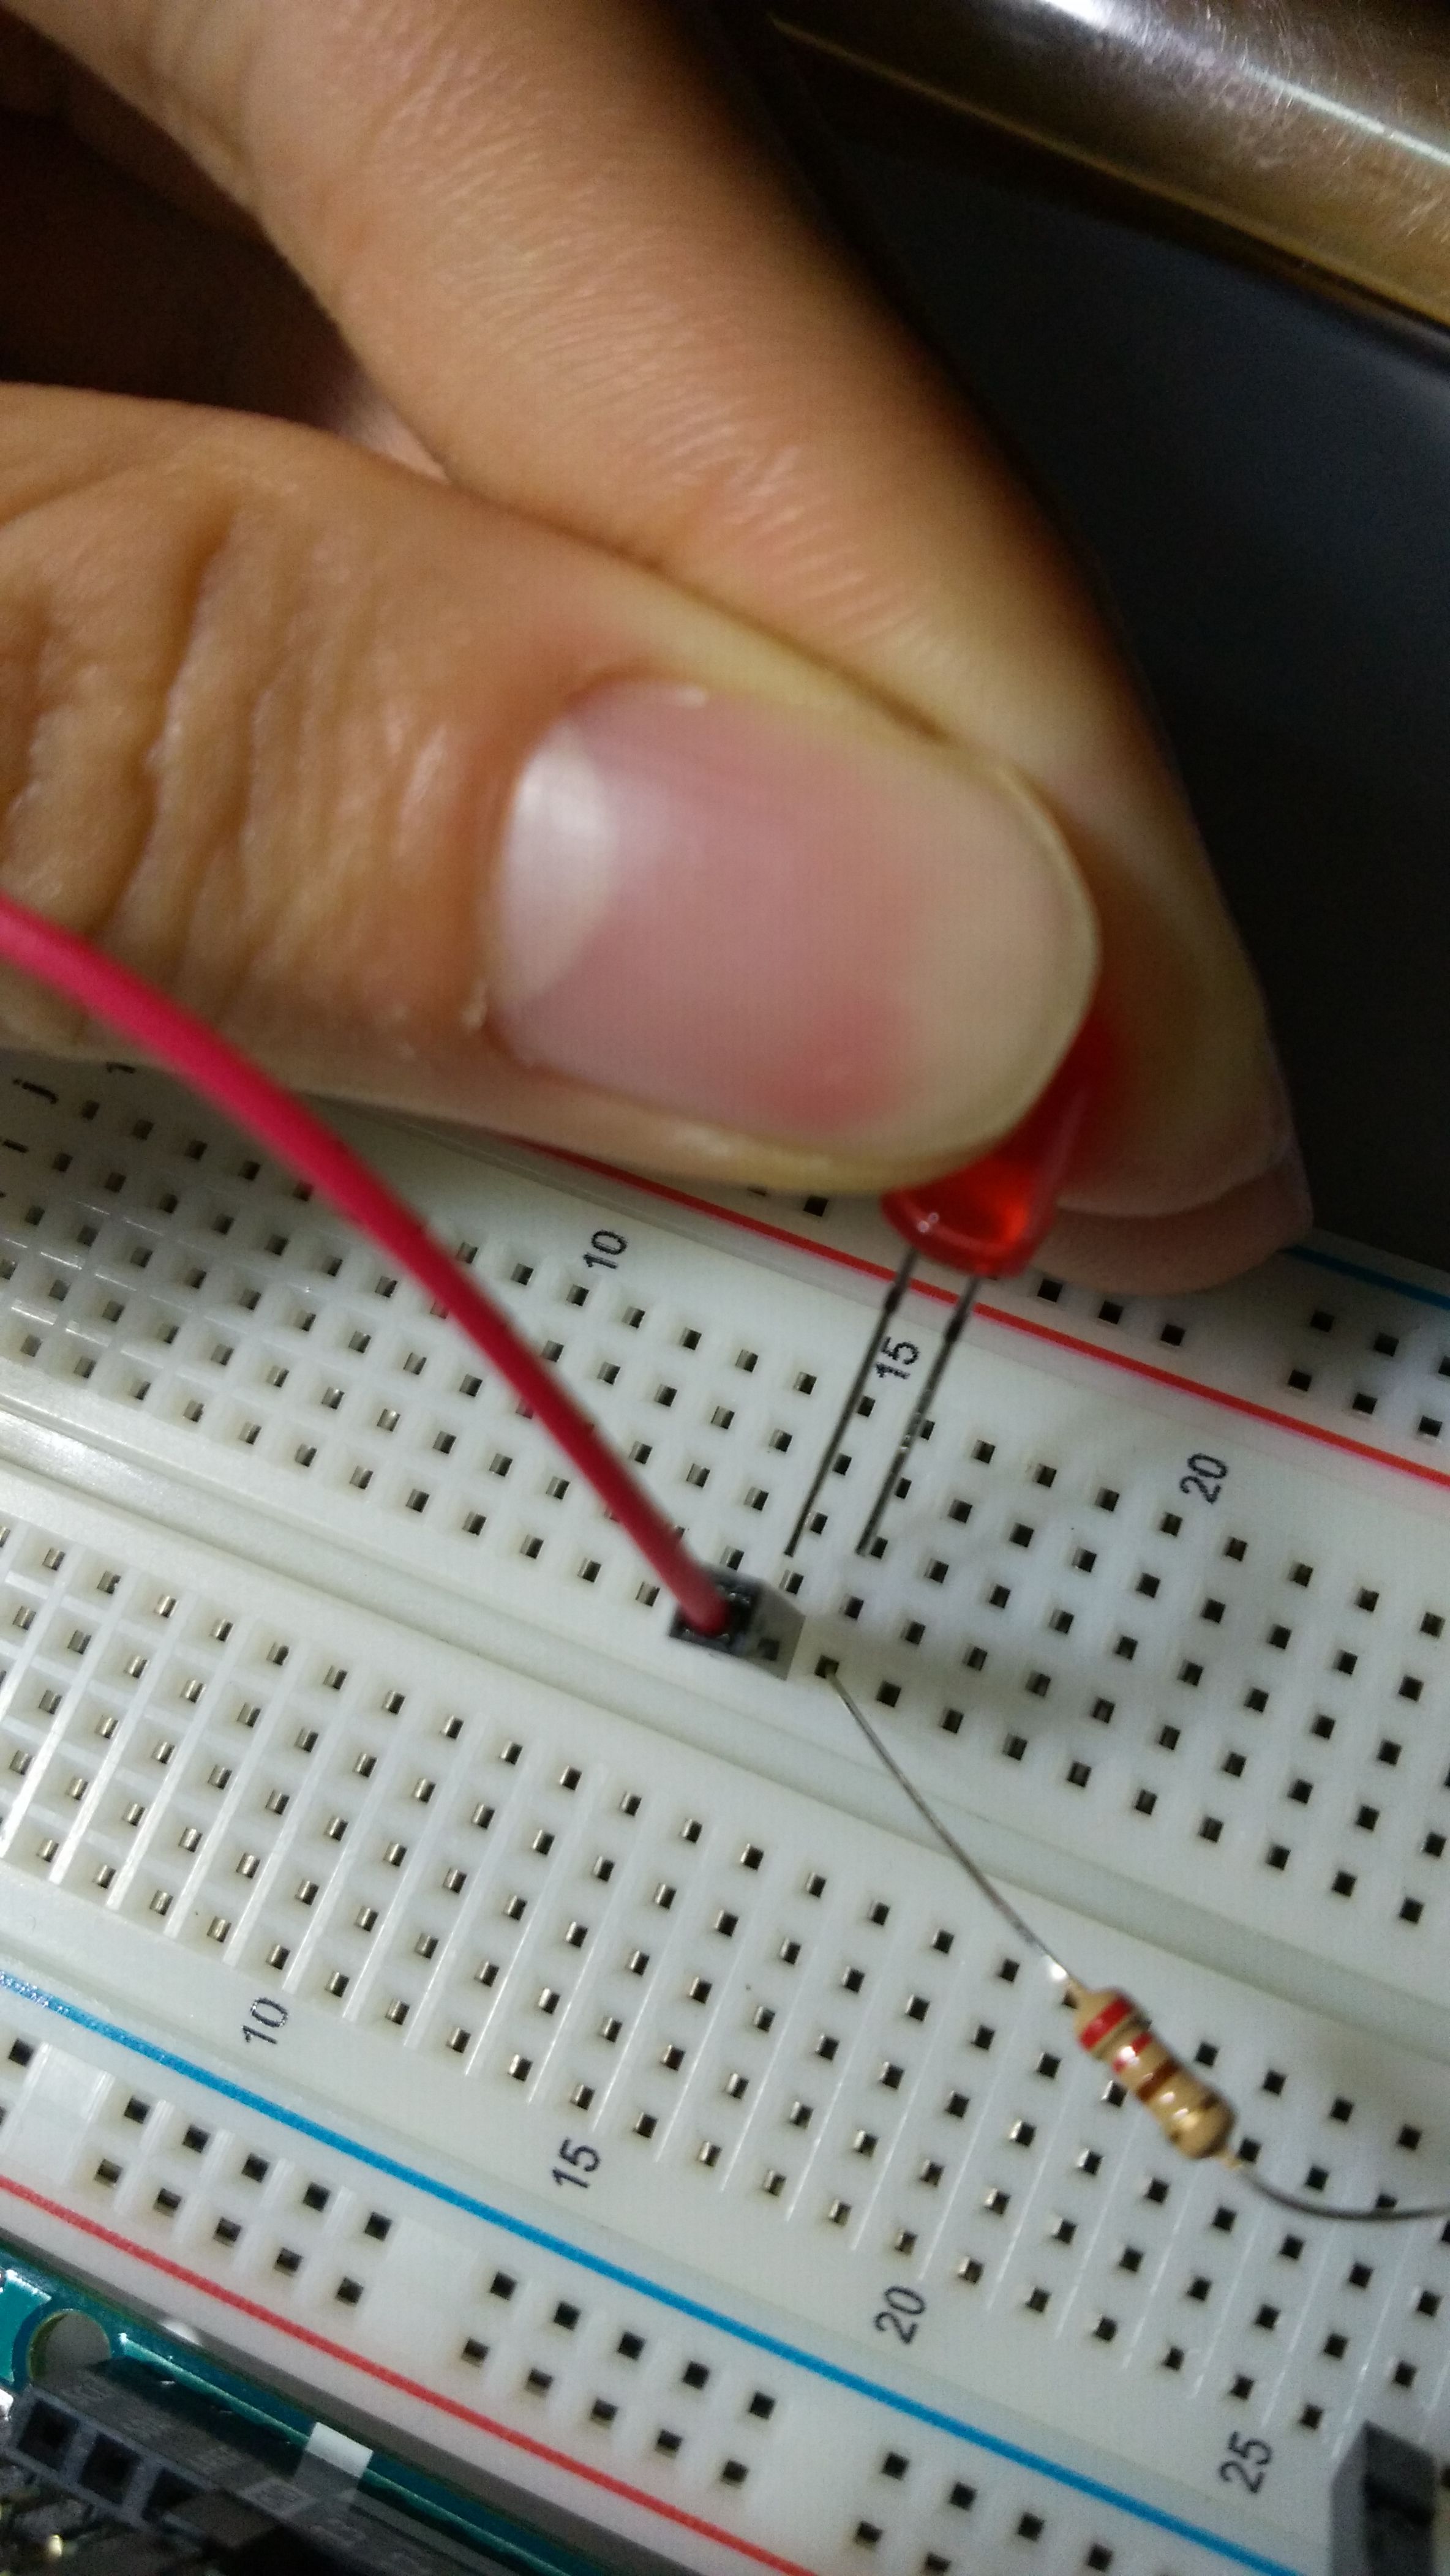
代码中写到,从 13 针脚位置输出电流,所以我们接下来就要把整个电路构建好,这里我们用红色杜邦线做正极,黄色线接公共端(也就是地线、0 线,电路板上就是 GND)。

红色的正极我们接到面包板上,然后在同一列接上我们的 LED,二极管有两个针脚,其中长的针脚是正极,短的接地,请谨记,二极管接反是不亮的。
然后我们在二极管负极的同一列接上一个 220 Ω 的电阻来保护电路,以防烧坏设备。这里可能会有人疑惑,怎么区分电阻呢,大家可以看到,电阻上有一环环的色圈,这种是色环电阻,每一个环代表不同的数值和比例,这个大家可以上网自行查找相关资料。
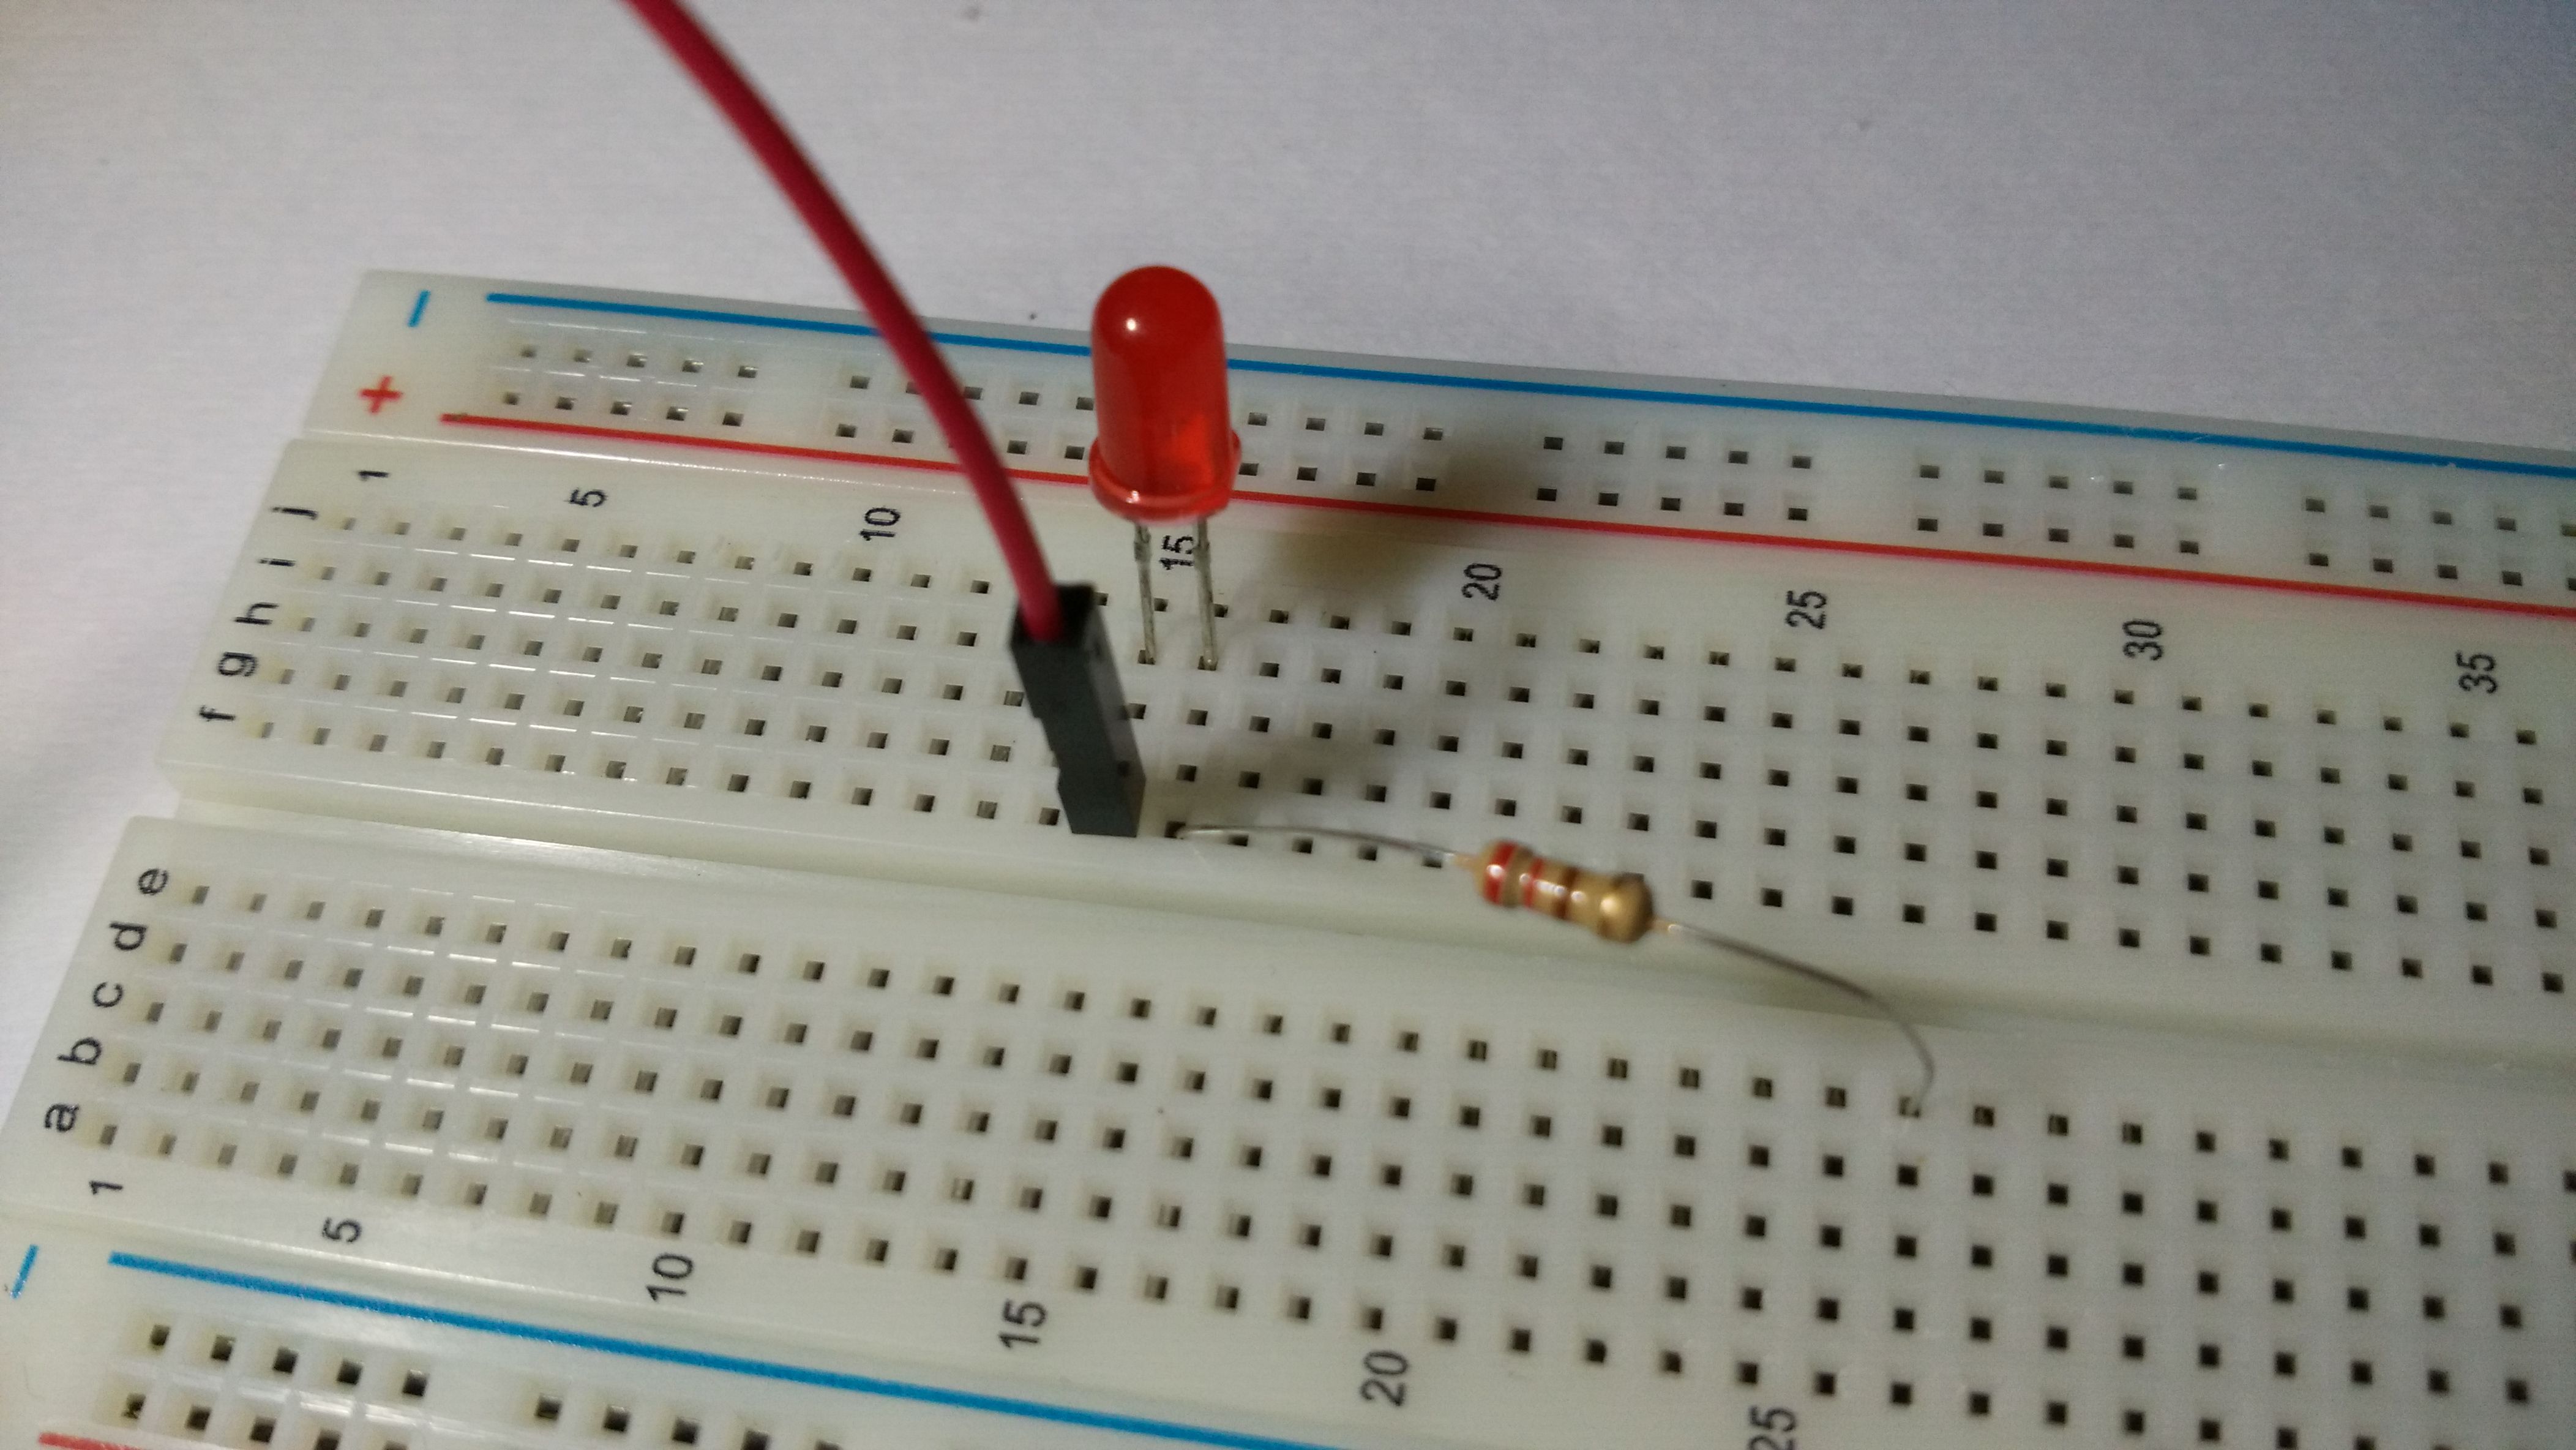
最后把电路完成,黄线负极接地。

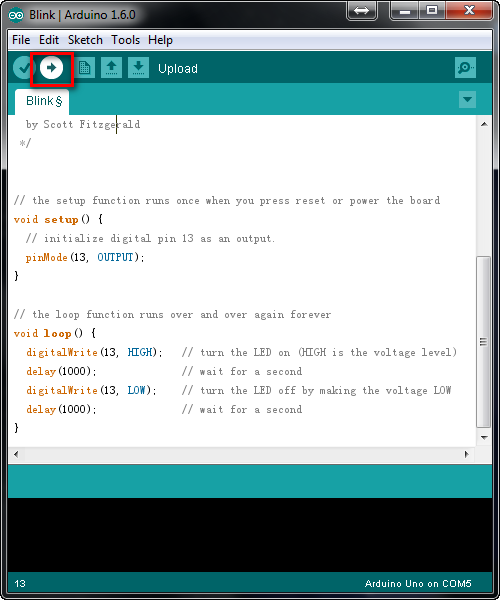
紧接着就是把 Arduino 接入到电脑,使用 Arduino IDE 烧录程序了,主界面就有 Upload 功能键。
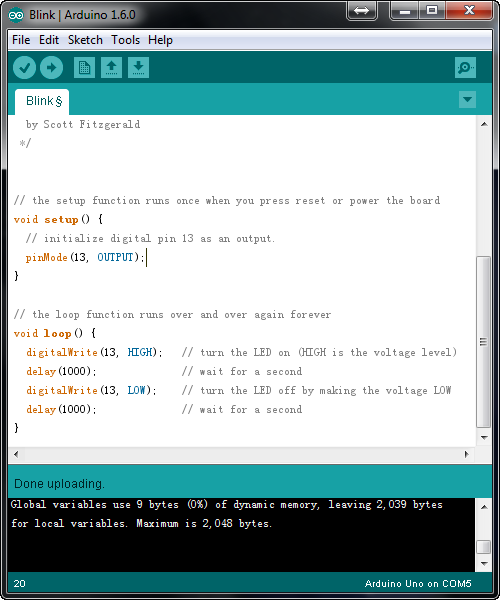
没有错误,成功编译并烧录。
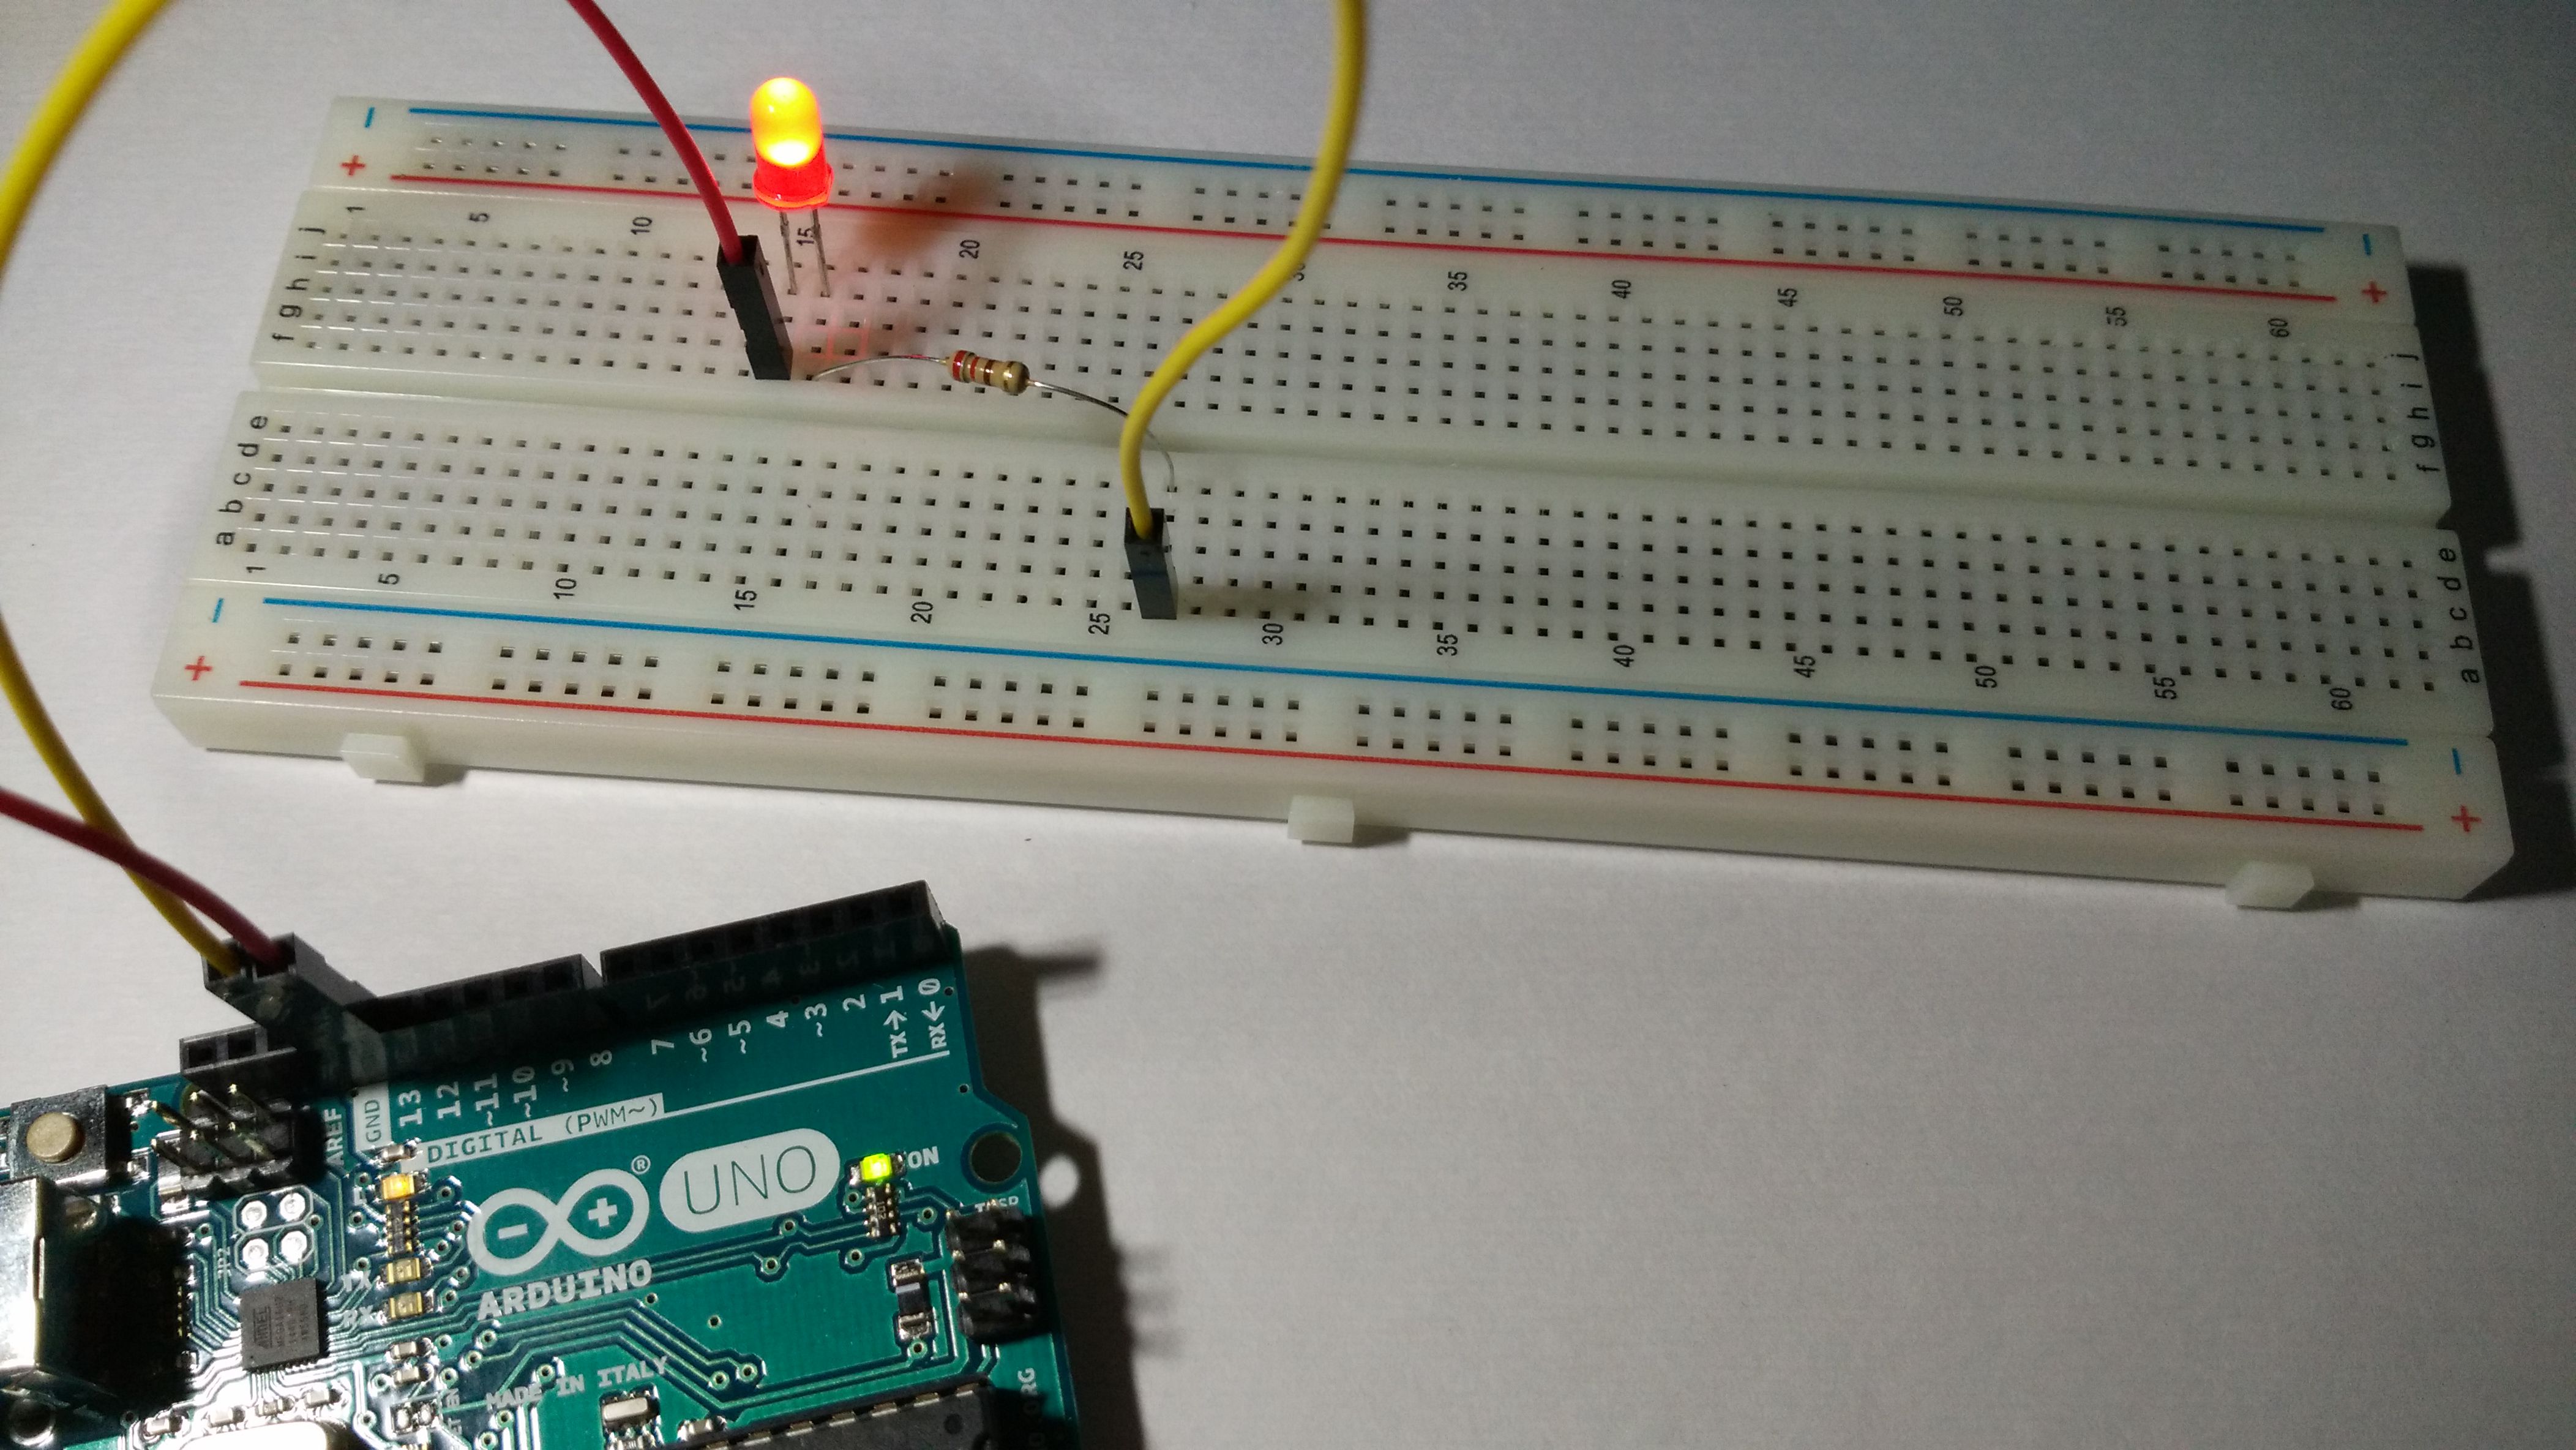
根据代码,成功点亮 LED,1 秒点亮,1 秒熄灭。
知道怎么操作之后我们就可以开始来自己 DIY 自己的程序了。来做一个 SOS 摩斯电码的 LED 闪烁程序吧。SOS 的摩斯电码就是 3 长 3 短,知道怎么亮之后就很容易操作了,我这里使用一个 For 循环来简洁代码。详细代码如下,这里我使用了 7 针脚。
/* Blink SOS By Sirius */void setup() {
// initialize digital pin 13 as an output.
pinMode(7, OUTPUT);
}// the loop function runs over and over again forever
void loop() {
for (int i = 0; i < 3; i = i + 1)
{
digitalWrite(7,HIGH);
delay(1000);
digitalWrite(7,LOW);
delay(1000);
}
for (int i = 0; i < 3;i = i + 1)
{
digitalWrite(7, HIGH); // turn the LED on (HIGH is the voltage level)
delay(300); // wait for a second
digitalWrite(7, LOW); // turn the LED off by making the voltage LOW
delay(300); // wait for a second
}
digitalWrite(7,LOW);
delay(3000);
}
烧录之后完美达到效果。
楼主请回答我几个问题:
第一你从什么时候开始玩极(黑)客(阔)的;
你用了多久达到现在这个境界?
一路走来感觉如何?
你主攻无线还是web安全呢?
你从哪里学来的技术?国外还是国内?
跑马灯更炫
骚年 少打点飞机 看手都脱皮